CREATIVE NEEDLEPOINT
Hi, and welcome to both newbies and experienced needlepoint devotees. With this info I hope to inspire you to stitch and to explore your own creativity, selecting colour combinations that appeal most to you and coming up
with your own unique patterns that express your personality. Needlepoint’s an easy craft to take up and it’s addictive. You’ll soon find you got more ideas than hours in the day, and are constantly looking at things – whether vintage fabric or patterned china – and thinking how you’d adapt it into needlepoint.
I’ve been stitching away for years, and started coming up with my own designs for a number of reasons.
Firstly, I find following charts awkward and tedious. They’re often printed to a very small scale, and if the chart’s in black & white it’s not always easy to distinguish between miniscule dots and dashes meant to indicate colour choices. Secondly, I couldn’t afford to buy needlepoint kits.
Thirdly, and this is the most important reason, part of why I sew is to create something unique. I don’t want to slavishly follow someone else’s pattern or use their colour scheme. What I make should reflect my personality. (Even if that means I occasionally create something like other people might not like quite as much as I do.)
Coming up with your own designs initially can seem daunting. You’re faced with a blank piece of canvas, which stops you in your tracks. What if your design isn’t good enough? What if it just looks like a dog’s dinner? Will it all be a waste of time and money? Worse of all, what if you discover you’re just not a creative person, that you’ve got the artistic genius of a housebrick?
Fear not, dear reader.
Okay, you might have the odd false start. Your first cushion might be so turgid in colour and pattern that even the cat won’t deign to use it to rest on, but the chances are it’ll be fine. You’ll probably see ways in which you could’ve improved it. A few contrasting stitches here, a lighter colour there, some more detail, a wider border. But skills are learnt gradually. Your first needlepoint project may be rather clumsily executed, but the next one will be better, and the next one better still. You’ll learn and grow in confidence. So, in the words of a famous Dad’s Army sergeant, ‘Don’t panic!’
The section starts with the basics of what equipment to buy and how to stitch, so let’s dive right in with your
needlepoint basics.
Q: Is needlepoint the same as cross stitch?
A: No, but they're from the same family. Siblings, you might say. Both are ways of stitching on canvas, but while cross stitch has a huge fanbase I think needlepoint's got pushed into the corner. Often known as 'tapestry', it's a hugely fun craft and can be as portable as embroidery, as addictive as knitting and you can play with colour and pattern to your heart's content.
Q: How many stitches to do have to learn?
A: One. No, really! There are fancy-schmanzy stitches you can do, but I've always stuck with one - tent stitch. If
you think of a tick (the swoosh sort, not the creepy-crawly) your stitch is like the long line of the tick. Or put
it another way, it’s like half a cross stitch. It's even easier to pick up a needle and start stitching needlepoint than it is to learn plain & purl.
Q: What materials do I need?
A: Canvas, wool and a big blunt needle. Canvas comes in different colours, generally a dazzling white or a sepia brown tone. Either one is fine, you’ll completely cover the surface with wool though it’s especially important to ensure full coverage when using the white version. You can buy canvas in a range of sizes, dependent on the number of holes per inch (or 2.5cm). If someone mentions ‘mesh count’ to you, it’s the holes per inch they’re talking about.
The more holes per inch the more stitches it’ll take to cover the canvas. That means you can add more intricate detail to your pattern on the plus side, but the downside is how slow the process becomes. The best
canvas to start on is a medium sized one, such as 12 holes per inch, and you can usually buy it by the metre or in pre-cut squares.
The canvas is available from your local craft shop or via ebay, as is the wool. You can't use knitting wool, by the way. It'd fray. Instead look for brands like DMC, Anchor or Appleton. There are three types of needlepoint yarn to choose from. These are crewel, tapestry and Persian. Crewel is a very fine 2-ply yarn. If you’re using a 12-mesh canvas you couldn’t get adequate coverage with just 2-ply. You’d need to use several strands mixed
together on your needle (which can be good as you can get a lovely colour mix, very painterly). Tapestry wool is
the best for starters, and for most projects. A stunning range of colours and good coverage. Persian yarn is similar
to crewel in that it’s made up of strands, 3 in this case, and you can mix the strands on the needle.
Beware of buying ‘vintage’ wool that you might find in thrift shops or ebay as sometimes it goes very thin and pretty much unusable. The needle you work with is a tapestry needle which is chunky and blunt. Any decent haberdashery or craft shop will sell them.
When threading your needle, just run your fingers along the wool. It’ll feel smoother in one direction
than the other, and you want to stitch with that smoothness rather than against it.
Thrifty tip: Craft magazines sometimes come with a free gift, a modest sized piece of canvas and a length of wool to make a small pin cushion or other project.
You don’t need to use the design they provide if you don’t like it. The canvas could be used for your own
individual design. Also, you sometimes find these little kits for a few pence in charity shops, or sometimes
you get lucky and find a pre printed canvas or half completed tapestry kit that was an unwanted gift or abandoned hobby. You could always unpick the stitches, turn over the pre printed canvas and use the backside of it. Or you
could cut away the unused canvas and again, use the unprinted side of it.
Q: When using canvas, do I need to use a frame?
A: Not necessarily. Canvas will distort as you stitch it. The rigid fabric will soften through handling, so don’t tug too much on your stitches or treat your canvas too roughly. If you’re careful it won’t distort noticeably, and even if it does you can usually stretch it back into shape. If you want to use a frame however, feel free to do so and any decent craft shop will advise you on which will best suit your needs.
Q: Any books you could recommend to get me started?
A: Yes. If cost is an issue, and if you can’t persuade someone to buy you them for a birthday or Christmas you should be able to pick them up in your local library or 2nd hand via Amazon. Try Kaffe Fassett’s ‘Glorious
Needlepoint’ or any of Mary Norden’s (‘Ethnic Needlepoint’ for eg) or Candace Bahouth’s needlepoint books. All
are full of inspiring images as well as the basic nuts & bolts side of things.
MY MIND’S A BLANK! WHERE CAN I GET MY IDEAS?
Ideas for needlepoint patterns come from lots of places. Magazines, posters, patterns on vintage china or an embroidered tablecloth, it doesn’t matter what the source, as long as you can translate it into something original
and personal. When it comes to colour combinations most of us have preferences. Look in your wardrobe, what do you see? Lots of blues and greens? Masses of pinks and purples? Those choices will probably be reflected in the crafts you create. If you want to experiment with colour before going to the time and expense of buying tapestry wool and starting to stitch, then a good way is to play around with arrangements. Take lots of balls of knitting wool and lay them out on the floor. Place a grey next to a turquoise, or a cream next to a yellow. Alternate darks and lights, add splashes of an unusual colour. What does your cream, taupe and ivory bundle of yarn look like with an electric blue lobbed into the mix? You can try the same thing with reels of thread, skeins of embroidery silk, even pieces of colourful paper. A sketch pad and a tin of coloured pencils might make you feel like you’re back at school, but they’re a great way of recording your findings for future ref.
WHAT’S THAT? IT’S A SWATCH
Before committing to a large project it can be good to make a swatch, a little section of your design, to check that you’ve got your colour choice right and the pattern works. These swatches don’t need to be thrown away afterwards. You could back with felt and turn them into coasters. Maybe back with a pretty fabric, fill with lavender and add a ribbon loop to make a scented bag for your wardrobe. Or – ever useful – turn them into pincushions. The stuffing could be whatever you’ve got to hand, whether chopped up tights or tee shirt material, or rice grains. The latter create a lovely crunchy texture and a nice weighty feel to the pin cushion. Or you could make a pincushion and use it to display brooches or hat pins.
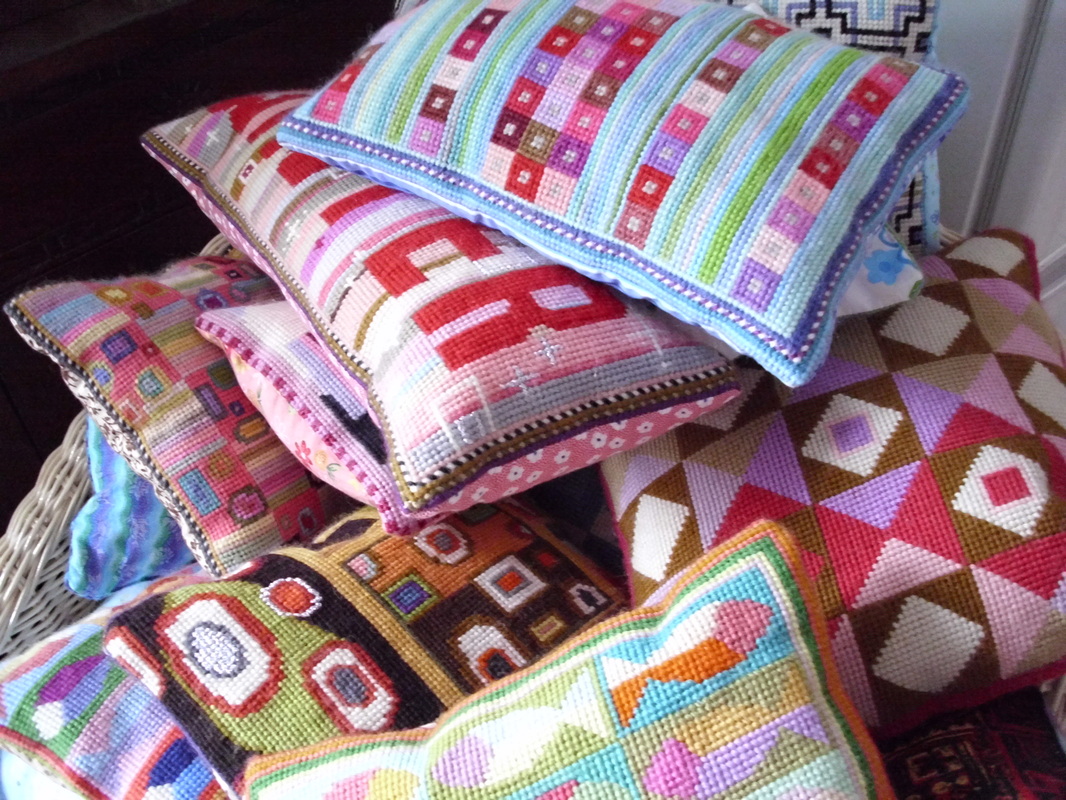
LIBERATE THE CUSHION MAKER IN YOU!
Let’s forget the notion that cushions come in standard shapes and sizes. They can be rectangular or square, or even circular. They can be such looooong rectangles that they turn into draught excluders. They can be stuffed with a commercially bought cushion pad or one you’ve cobbled together yourself out of an old sheet and some polyester toy stuffing. Or you could’ve chopped up several old tee shirts and stuffed your cushion with those instead. Recycling fabric to use as stuffing is environmentally friendly, and cheap too!
Cushion designs can be meticulously worked out beforehand or stitched on the hoof. You can make one unique cushion or several in the exact same design, or use one pattern and make it in several colour combinations.
Any interior designer will tell you that cushions can liven up a dull room or add a touch of seasonal flavour (russets for Autumn or daffodil yellow for Spring).
A cushion can make a great gift, stitched with a baby’s name and birthdate for their christening perhaps.
Or how about finding out your friend’s favourite book and making a cushiony version of it. Think of
some classic editions and how well their covers would translate into stitched versions. A single word stitched
in big bold lettering can look good on a cushion, like a scarlet LOVE.
LET’S START AT THE VERY BEGINNING
Okay, you’ve got a square of blank canvas, several skeins of tapesty wool, needle, scissors and a vague idea of what you want to make. Something to do with blackbirds in a pie, or maybe a fat marmalade coloured cat on a striped
mat? But you just don’t know what to do next. There’s a panicky look in your eyes. You’re scared of mucking the
whole thing up and wasting pounds worth of wool.
Right, take a deep breath. Now, let’s look at your design. A vague idea of what to make is sometimes fine, you can make things up on the hoof, but at other times that vagueness is going to scupper you. Let’s assume you’re making a cushion. Start with a piece of blank paper that’s the size of the cushion you want to make, and gather up some coloured pencils or acrylic paints. Put a border in place. A picture always looks good with a suitable frame.
Now, build up your design. That marmalade cat, is your cushion going to feature one big cat in the centre of the cushion? Or a group of cats? What about the background? Is the moggy going to sit on a bold tartan or an abstract swirl of colours? Try to build up some detail, maybe draw or paint two or three versions of your pattern to get the scale right.
When you’re happy with what you’ve got it’s time to thread that needle. I always start with the border. A
few solid lines of colour, often a black & white line of alternating stitches.
Handy tip: having a border of alternating stitches can be really useful to – I know this sounds daft! – remind you of the direction of your stitches. We’ve all stitched away quite merrily before suddenly realizing – with a few choice swear words – that our stitches are facing the wrong direction. (Think of the letter V. Your stitches should be the / part of the V, not the \ but especially if you’re tired or rushing, it’s easy to make mistakes. Before you know it you’ve stitched dozens of \\\\\\\s. Grrrr! A seam unripper is a handy tool to have for those occasions.)
One of my favourite ways of working is to have at least two needlepoint projects on the go at any time.
That way, if you get thoroughly fed up with one piece, you can switch to the other, then back again. You
don’t get too bored, and time away from a project can stimulate you to attack it with renewed vigour.
Be prepared to change your design as you work, add extra detail if the design looks too dull or simplify if it looks to
complex.
THE JOY OF JOURNALS
You might’ve come across a publication called ‘Wreck This Journal’ or maybe viewed images on Flickr of people who’ve done just that. Art students get used to the idea of keeping a journal, but for us non-studenty types it’s an
idea that can seem daunting.
For those who haven’t seen it ‘Wreck This Journal’ is at heart a blank notepad filled with suggestions about what to do on its bare pages. The journal might suggest you fill a page with circles or green triangles or stickers or
glitter, anything aimed at getting you to let go and explore your creativity without fear of failure. Anything
goes. You can be as childish as you want and make a mess or sophisticated and make something beautiful or just
make some weird mash-up that works on both levels.
If you’re uncertain then maybe make a commercial publication like ‘Wreck This Journal’ as your first step.
After that, it’s easy to make your own version of an art journal. Just take any old blank notepad, though a hard backed one is useful as it’ll stand up to a lot of wear& tear. The pages should be unlined and don’t pick particularly flimsy paper. Use it as a source of inspiration for your needlepoint designs, and don’t be precious about it. Forget about anyone viewing your journal. It’s for you, not for public consumption (unless you want to make it public via
something like Flickr).
SCRAPBOOK
Talk about scrapbooking in a craft store and you’ll be shepherded towards shelf loads of cutesy stickers, fancy marbled papers and all kinds of decorative bits & bobs. When I was a kid scrapbooking wasn’t a verb.
You stuck things in a scrapbook, mainly birthday cards, seaside holiday postcards or pages cut from magazines.
Ahh! How we passed the time before the invention of multiple TV channels, DVDs and the internet!
When I suggest you keep a scrapbook, that’s the kind of thing I’m talking about. A notebook or sketchpad in which you glue things (or sellotape them). Cut outs from weekend colour supplements, fashion and interiors magazines, postcards from art galleries, even bits of packaging such as sweet wrappers. Anything that grabs your eye and makes you think ‘Hmm, that would be a great shade of purple for a cushion’ or ‘those veggies would look good translated into needlepoint’.
One step up from keeping a scrapbook (which is more a collection of cuttings than any designer-like) is making
collages. Apart from anything else, all this cutting out and sticking down is a good way to keep your mind away from snacking and your fingers out of the biscuit tin …
with your own unique patterns that express your personality. Needlepoint’s an easy craft to take up and it’s addictive. You’ll soon find you got more ideas than hours in the day, and are constantly looking at things – whether vintage fabric or patterned china – and thinking how you’d adapt it into needlepoint.
I’ve been stitching away for years, and started coming up with my own designs for a number of reasons.
Firstly, I find following charts awkward and tedious. They’re often printed to a very small scale, and if the chart’s in black & white it’s not always easy to distinguish between miniscule dots and dashes meant to indicate colour choices. Secondly, I couldn’t afford to buy needlepoint kits.
Thirdly, and this is the most important reason, part of why I sew is to create something unique. I don’t want to slavishly follow someone else’s pattern or use their colour scheme. What I make should reflect my personality. (Even if that means I occasionally create something like other people might not like quite as much as I do.)
Coming up with your own designs initially can seem daunting. You’re faced with a blank piece of canvas, which stops you in your tracks. What if your design isn’t good enough? What if it just looks like a dog’s dinner? Will it all be a waste of time and money? Worse of all, what if you discover you’re just not a creative person, that you’ve got the artistic genius of a housebrick?
Fear not, dear reader.
Okay, you might have the odd false start. Your first cushion might be so turgid in colour and pattern that even the cat won’t deign to use it to rest on, but the chances are it’ll be fine. You’ll probably see ways in which you could’ve improved it. A few contrasting stitches here, a lighter colour there, some more detail, a wider border. But skills are learnt gradually. Your first needlepoint project may be rather clumsily executed, but the next one will be better, and the next one better still. You’ll learn and grow in confidence. So, in the words of a famous Dad’s Army sergeant, ‘Don’t panic!’
The section starts with the basics of what equipment to buy and how to stitch, so let’s dive right in with your
needlepoint basics.
Q: Is needlepoint the same as cross stitch?
A: No, but they're from the same family. Siblings, you might say. Both are ways of stitching on canvas, but while cross stitch has a huge fanbase I think needlepoint's got pushed into the corner. Often known as 'tapestry', it's a hugely fun craft and can be as portable as embroidery, as addictive as knitting and you can play with colour and pattern to your heart's content.
Q: How many stitches to do have to learn?
A: One. No, really! There are fancy-schmanzy stitches you can do, but I've always stuck with one - tent stitch. If
you think of a tick (the swoosh sort, not the creepy-crawly) your stitch is like the long line of the tick. Or put
it another way, it’s like half a cross stitch. It's even easier to pick up a needle and start stitching needlepoint than it is to learn plain & purl.
Q: What materials do I need?
A: Canvas, wool and a big blunt needle. Canvas comes in different colours, generally a dazzling white or a sepia brown tone. Either one is fine, you’ll completely cover the surface with wool though it’s especially important to ensure full coverage when using the white version. You can buy canvas in a range of sizes, dependent on the number of holes per inch (or 2.5cm). If someone mentions ‘mesh count’ to you, it’s the holes per inch they’re talking about.
The more holes per inch the more stitches it’ll take to cover the canvas. That means you can add more intricate detail to your pattern on the plus side, but the downside is how slow the process becomes. The best
canvas to start on is a medium sized one, such as 12 holes per inch, and you can usually buy it by the metre or in pre-cut squares.
The canvas is available from your local craft shop or via ebay, as is the wool. You can't use knitting wool, by the way. It'd fray. Instead look for brands like DMC, Anchor or Appleton. There are three types of needlepoint yarn to choose from. These are crewel, tapestry and Persian. Crewel is a very fine 2-ply yarn. If you’re using a 12-mesh canvas you couldn’t get adequate coverage with just 2-ply. You’d need to use several strands mixed
together on your needle (which can be good as you can get a lovely colour mix, very painterly). Tapestry wool is
the best for starters, and for most projects. A stunning range of colours and good coverage. Persian yarn is similar
to crewel in that it’s made up of strands, 3 in this case, and you can mix the strands on the needle.
Beware of buying ‘vintage’ wool that you might find in thrift shops or ebay as sometimes it goes very thin and pretty much unusable. The needle you work with is a tapestry needle which is chunky and blunt. Any decent haberdashery or craft shop will sell them.
When threading your needle, just run your fingers along the wool. It’ll feel smoother in one direction
than the other, and you want to stitch with that smoothness rather than against it.
Thrifty tip: Craft magazines sometimes come with a free gift, a modest sized piece of canvas and a length of wool to make a small pin cushion or other project.
You don’t need to use the design they provide if you don’t like it. The canvas could be used for your own
individual design. Also, you sometimes find these little kits for a few pence in charity shops, or sometimes
you get lucky and find a pre printed canvas or half completed tapestry kit that was an unwanted gift or abandoned hobby. You could always unpick the stitches, turn over the pre printed canvas and use the backside of it. Or you
could cut away the unused canvas and again, use the unprinted side of it.
Q: When using canvas, do I need to use a frame?
A: Not necessarily. Canvas will distort as you stitch it. The rigid fabric will soften through handling, so don’t tug too much on your stitches or treat your canvas too roughly. If you’re careful it won’t distort noticeably, and even if it does you can usually stretch it back into shape. If you want to use a frame however, feel free to do so and any decent craft shop will advise you on which will best suit your needs.
Q: Any books you could recommend to get me started?
A: Yes. If cost is an issue, and if you can’t persuade someone to buy you them for a birthday or Christmas you should be able to pick them up in your local library or 2nd hand via Amazon. Try Kaffe Fassett’s ‘Glorious
Needlepoint’ or any of Mary Norden’s (‘Ethnic Needlepoint’ for eg) or Candace Bahouth’s needlepoint books. All
are full of inspiring images as well as the basic nuts & bolts side of things.
MY MIND’S A BLANK! WHERE CAN I GET MY IDEAS?
Ideas for needlepoint patterns come from lots of places. Magazines, posters, patterns on vintage china or an embroidered tablecloth, it doesn’t matter what the source, as long as you can translate it into something original
and personal. When it comes to colour combinations most of us have preferences. Look in your wardrobe, what do you see? Lots of blues and greens? Masses of pinks and purples? Those choices will probably be reflected in the crafts you create. If you want to experiment with colour before going to the time and expense of buying tapestry wool and starting to stitch, then a good way is to play around with arrangements. Take lots of balls of knitting wool and lay them out on the floor. Place a grey next to a turquoise, or a cream next to a yellow. Alternate darks and lights, add splashes of an unusual colour. What does your cream, taupe and ivory bundle of yarn look like with an electric blue lobbed into the mix? You can try the same thing with reels of thread, skeins of embroidery silk, even pieces of colourful paper. A sketch pad and a tin of coloured pencils might make you feel like you’re back at school, but they’re a great way of recording your findings for future ref.
WHAT’S THAT? IT’S A SWATCH
Before committing to a large project it can be good to make a swatch, a little section of your design, to check that you’ve got your colour choice right and the pattern works. These swatches don’t need to be thrown away afterwards. You could back with felt and turn them into coasters. Maybe back with a pretty fabric, fill with lavender and add a ribbon loop to make a scented bag for your wardrobe. Or – ever useful – turn them into pincushions. The stuffing could be whatever you’ve got to hand, whether chopped up tights or tee shirt material, or rice grains. The latter create a lovely crunchy texture and a nice weighty feel to the pin cushion. Or you could make a pincushion and use it to display brooches or hat pins.
LIBERATE THE CUSHION MAKER IN YOU!
Let’s forget the notion that cushions come in standard shapes and sizes. They can be rectangular or square, or even circular. They can be such looooong rectangles that they turn into draught excluders. They can be stuffed with a commercially bought cushion pad or one you’ve cobbled together yourself out of an old sheet and some polyester toy stuffing. Or you could’ve chopped up several old tee shirts and stuffed your cushion with those instead. Recycling fabric to use as stuffing is environmentally friendly, and cheap too!
Cushion designs can be meticulously worked out beforehand or stitched on the hoof. You can make one unique cushion or several in the exact same design, or use one pattern and make it in several colour combinations.
Any interior designer will tell you that cushions can liven up a dull room or add a touch of seasonal flavour (russets for Autumn or daffodil yellow for Spring).
A cushion can make a great gift, stitched with a baby’s name and birthdate for their christening perhaps.
Or how about finding out your friend’s favourite book and making a cushiony version of it. Think of
some classic editions and how well their covers would translate into stitched versions. A single word stitched
in big bold lettering can look good on a cushion, like a scarlet LOVE.
LET’S START AT THE VERY BEGINNING
Okay, you’ve got a square of blank canvas, several skeins of tapesty wool, needle, scissors and a vague idea of what you want to make. Something to do with blackbirds in a pie, or maybe a fat marmalade coloured cat on a striped
mat? But you just don’t know what to do next. There’s a panicky look in your eyes. You’re scared of mucking the
whole thing up and wasting pounds worth of wool.
Right, take a deep breath. Now, let’s look at your design. A vague idea of what to make is sometimes fine, you can make things up on the hoof, but at other times that vagueness is going to scupper you. Let’s assume you’re making a cushion. Start with a piece of blank paper that’s the size of the cushion you want to make, and gather up some coloured pencils or acrylic paints. Put a border in place. A picture always looks good with a suitable frame.
Now, build up your design. That marmalade cat, is your cushion going to feature one big cat in the centre of the cushion? Or a group of cats? What about the background? Is the moggy going to sit on a bold tartan or an abstract swirl of colours? Try to build up some detail, maybe draw or paint two or three versions of your pattern to get the scale right.
When you’re happy with what you’ve got it’s time to thread that needle. I always start with the border. A
few solid lines of colour, often a black & white line of alternating stitches.
Handy tip: having a border of alternating stitches can be really useful to – I know this sounds daft! – remind you of the direction of your stitches. We’ve all stitched away quite merrily before suddenly realizing – with a few choice swear words – that our stitches are facing the wrong direction. (Think of the letter V. Your stitches should be the / part of the V, not the \ but especially if you’re tired or rushing, it’s easy to make mistakes. Before you know it you’ve stitched dozens of \\\\\\\s. Grrrr! A seam unripper is a handy tool to have for those occasions.)
One of my favourite ways of working is to have at least two needlepoint projects on the go at any time.
That way, if you get thoroughly fed up with one piece, you can switch to the other, then back again. You
don’t get too bored, and time away from a project can stimulate you to attack it with renewed vigour.
Be prepared to change your design as you work, add extra detail if the design looks too dull or simplify if it looks to
complex.
THE JOY OF JOURNALS
You might’ve come across a publication called ‘Wreck This Journal’ or maybe viewed images on Flickr of people who’ve done just that. Art students get used to the idea of keeping a journal, but for us non-studenty types it’s an
idea that can seem daunting.
For those who haven’t seen it ‘Wreck This Journal’ is at heart a blank notepad filled with suggestions about what to do on its bare pages. The journal might suggest you fill a page with circles or green triangles or stickers or
glitter, anything aimed at getting you to let go and explore your creativity without fear of failure. Anything
goes. You can be as childish as you want and make a mess or sophisticated and make something beautiful or just
make some weird mash-up that works on both levels.
If you’re uncertain then maybe make a commercial publication like ‘Wreck This Journal’ as your first step.
After that, it’s easy to make your own version of an art journal. Just take any old blank notepad, though a hard backed one is useful as it’ll stand up to a lot of wear& tear. The pages should be unlined and don’t pick particularly flimsy paper. Use it as a source of inspiration for your needlepoint designs, and don’t be precious about it. Forget about anyone viewing your journal. It’s for you, not for public consumption (unless you want to make it public via
something like Flickr).
SCRAPBOOK
Talk about scrapbooking in a craft store and you’ll be shepherded towards shelf loads of cutesy stickers, fancy marbled papers and all kinds of decorative bits & bobs. When I was a kid scrapbooking wasn’t a verb.
You stuck things in a scrapbook, mainly birthday cards, seaside holiday postcards or pages cut from magazines.
Ahh! How we passed the time before the invention of multiple TV channels, DVDs and the internet!
When I suggest you keep a scrapbook, that’s the kind of thing I’m talking about. A notebook or sketchpad in which you glue things (or sellotape them). Cut outs from weekend colour supplements, fashion and interiors magazines, postcards from art galleries, even bits of packaging such as sweet wrappers. Anything that grabs your eye and makes you think ‘Hmm, that would be a great shade of purple for a cushion’ or ‘those veggies would look good translated into needlepoint’.
One step up from keeping a scrapbook (which is more a collection of cuttings than any designer-like) is making
collages. Apart from anything else, all this cutting out and sticking down is a good way to keep your mind away from snacking and your fingers out of the biscuit tin …
